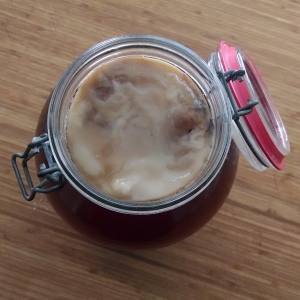
It has been a few weeks since I mixed together the sugar, tea, water and a bottle of store-bought kombucha to jump-start a scoby. Here is that earlier post which explains a scoby and includes the directions on how you can do the same if you like.

According to the source of the recipe I was using to make the first batch, ‘True Brews’ by Emma Christensen , I was supposed to check the mixture every day and start tasting it around day 7. Although I am not much of a rules follower, I did exactly that. I was expecting the first taste to be flat or vinegary or a little off because all instructions up to that point were to throw out the first batch of liquid. But, much to my surprise, the first taste was AWESOME! I was amazed at how closely my homemade kombucha tasted to that of the brand with which I started. And the effervescence was great. Just the right amount of bubbles. My scoby was barely 1/16″ thick at that point but it was already performing admirably so I bottled up seven bottles and moved on to batch two.
I made another sugar, tea and water mixture just like the first and let it cool. This time I added two cups of my homemade kombucha rather than jump-start with the store-bought variety. Again, I tucked it all away in the pantry closet and walked away for seven days. Again, the results when I tasted on day 7 were fantastic so I bottled it up and repeated the process.
By now I am on batch four, the scoby has thickened up to about 3/16″, and I am very pleased with the results. Every seven days, I refill seven bottles. I generally drink a bottle a day so this production rate is pretty close to perfect for our household! Huzzah! And SO easy!
One thought on “Making Kombucha – The Update”